This free guitar lesson is for the absolute beginner acoustic guitar player. I’ll be adding more content to this particular lesson as well as adding many more blog topics over the next coming months. This guitar lesson will cover some basics on reading chord diagrams as well as the basics of learning how to count and and play rhythm.
Positioning The Guitar
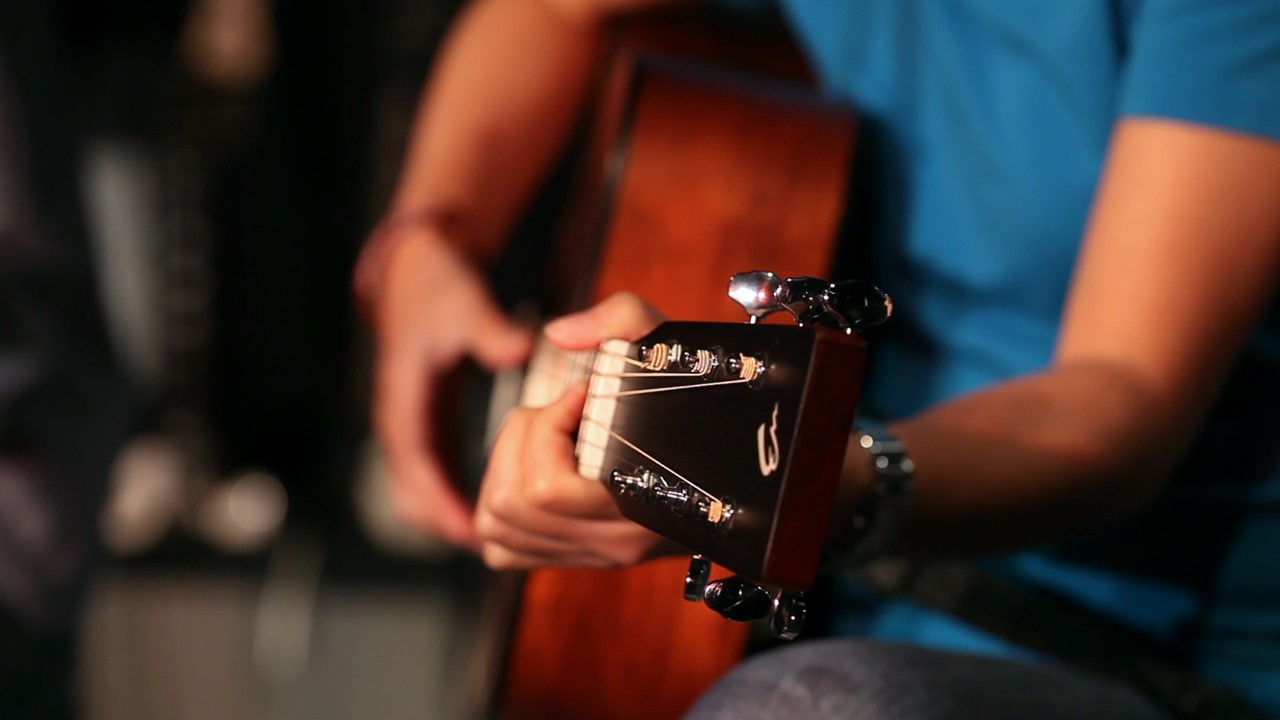
The photo above with Jessica shows how the guitar is properly held. Notice how it is positioned to her body and how the left hand thumb and wrist are positioned. This is an excellent posture for holding the guitar with greater ease.
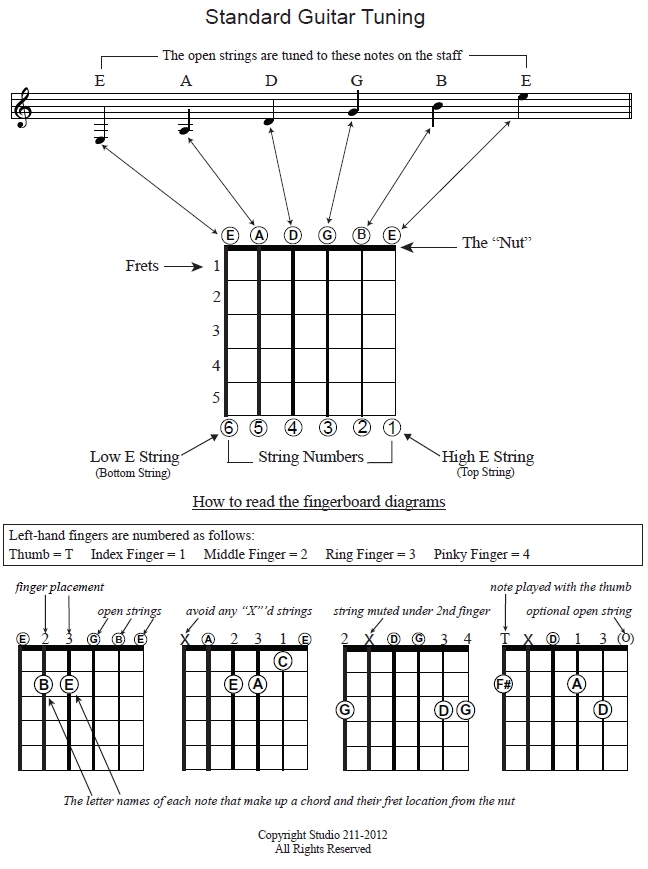
Reading Chord Diagrams
Essential Beginner Guitar Chords
Now that you’ve had a chance to review the chart on how to read chord diagrams, take a look at the chords below to determine finger placement.
Basic Open Position Chords – Major and Minor
Notice that I’ve colored in the ‘root’ of the chord in each chord diagram. This is the note that the chord is named for and is the predominant sound of the chord. The root of Emi is E. The root of Ami is A etc. I prefer to illustrate all of my own chord diagrams to show you each note that makes up the chords. You need to start memorizing them so that you can look at any note on the fingerboard and name it instantly.
Minor Chords
Note that the chord symbols for various types of chords will vary. An E Minor chord for instance can be Eminor, Emin, Emi or Em. An old school version of this was E- and is no longer used in modern text books. They all mean the same thing. Practice these shapes so that you can at least get a good sound out of them. That way you’ll be ready to play along with the video samples below!
There are only three minor chords in the open position that do not require a first-finger bar to play them!

Playing Chords With Rhythm
If you’ve never learned to read basic rhythms then take a look at the outline below. The standard music notation is shown with the equivalent rhythm value of ‘rhythm slashes’ written above. These ‘slashes’ are a handy way to show a guitar player how to strum the rhythm of a chord. This is way more convenient then having to read the notation for chords on the music staff! Compare the rhythm-slashes to the standard notation of the Em chord below! This example show the Whole Note rhythm.
Whole Note Rhythm
The Whole Note rhythm is a hollow note body without a note stem. This ‘figure’ is a note value that is four beats in length. Most commonly a measure or ‘bar’ of music will contain just four beats which means the Whole Note occupies the entire bar. Any rhythm in a bar has to add up to four beats in total. The Time Signature 4/4 is indicated just after the clef. The top number means four beats in each bar. The bottom number tells us the quarter note rhythm is worth one beat.

Now without all the chord notation we just have the name of the chord and the desired rhythm pattern like this!.

You will notice the two symbols below one indicating down strum and the other indicating the up strum.

Let’s practice the Em and Am chords using the whole note rhythm. There is a constant beat that you can hear throughout and you need to practice tapping your foot on it accurately.
Note that the tempo of the exercises are indicated as bpm’s which means beats per minute ie) 90bpm. Another way of saying it is that there are 90 quarter note beats in one minute.
Please start with the VOLUME LOWERED to get the level suitable for your playback device!
Half Notes
Here are the rhythm slashes with notation in Half Note rhythms. Half Notes are worth two beats so half of the value of the whole note!

Try this exercise with half notes!
I think you get idea of how the rhythm is breaking down now. Have a look the other 3 rhythm types were covering in this lesson. I’m just using single notes in the standard notation for demonstration but its the same rhythmic value
Quarter Notes
Now that were getting down to the Quarter Note Rhythm it’s more practical just to show a single note indicating the rhythm in the standard notation. Of course were playing a chord and not a single not but the rhythm is the same. Each Quarter note is worth one beat so four per bar. The quarter note rhythm is what we naturally tap our foot on. That’s the beat!

Let’s get some practice in on the tricky D minor chord in this next practice example. For now, remember to tap your foot on each and every beat!
Eighth Notes
Eighth notes divide the quarter note equally in half. We refer to this as the division of the beat. Notice that this is where the up strum comes into play. Think of the down strum on the foot tap and the up strum when the foot rises just before the next beat goes down again. Strive to play the eighth note rhythm as evenly as possible alternating down up strums. It is important to realize that you need to lift your fingers off the chord on the “an” of the 4th beat in order to make it to the next chord on time. You still need to strum as you lift your fingers to transition and this can be a bit tricky at first!

Remember to tap that foot on the 1 2 3 4!!
Sixteenth Notes
Sixteenth notes are referred to as the subdivision of the beat. We’ve divided it twice. Each sixteenth note is 1/4 of one beat so you can have four sixteenth notes on one beat. It would be unusual to play sixteen sixteenth notes in a bar as a repetitive rhythm because because it would simply be well – too repetitive. Sixteenth note rhythms are common in songs with slower tempos such as in ballads. There’s more time to fill up the space rhythmically. Keep in mind that it is preferable to play both of the eighth notes on a beat with two down strums at slower tempos and not down up. Up strums at slower tempos on the off beats tend to feel a bit dragging. You will get a feel for this when you’ve practiced this next example which will include some quarter and eighth note rhythms.

Even though the down strum occurs on the “an” of the fourth beat you will still need to lift off to get to the next chord on time! This will give your chord transitions a much more natural flow.
Major Chords
There are only five major chords in the open position that do not require a first-finger bar to play them! Rehearse these chord shapes individually then proceed to the next practice progressions.

This next exercise is played at 70bpm’s but if you’re not able to keep up yet practice it more slowly until you can gradually increase your tempo!
To be continued gang! I hope this was enough to get you started on your musical journey!